How to Create an Accessible Excel Template
It is possible to create your own accessible template from scratch in Excel 2010 and later. You can also edit and modify the existing prepackaged templates to ensure that they are accessible. Remember to save your new or modified template with a name easily recognizable.
Create a new document by going to File > New > Blank Workbook.
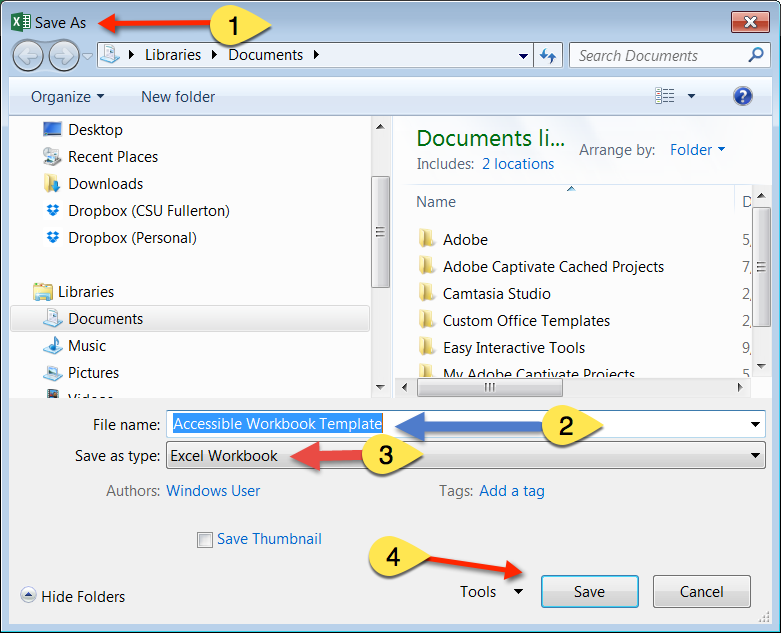
- Go to menu item: File > Save As
- In the File name box, type a name for the template. Using a descriptive file name (e.g., “Accessible Inventory Template”) will increase the prominence of the accessibility status. Also, filling in the text box labeled Tags with the term “accessibility” will improve its searchability as an accessible file.
- In the Save as type list, select Excel Template
- Click Save
After saving the template, you should double-check the accessibility of the document by using the Accessibility Checker to review your document against a set of possible issues that users with disabilities may experience. Microsoft offers accessible templates for download:
-
Accessible Excel template sampler
- Download this Excel template which has links to a variety of other template types which are considered accessible by Microsoft.
Alternative Text
Alternative text, also known as Alt Text, appears when you move your pointer over a picture or object, and helps people that use screen readers to understand the content of images in your file. For many readers, this is the only information they will have about the images and objects. Alt text should be included for any of the following objects in your workbook: pictures, clip art, charts, tables, shapes (that don’t contain text and are not in groups), SmartArt graphics, groups (all objects in this list, with the exception of shapes, should also have alt text when in groups), embedded objects, video and audio files.
How to Add AltText to images and objects
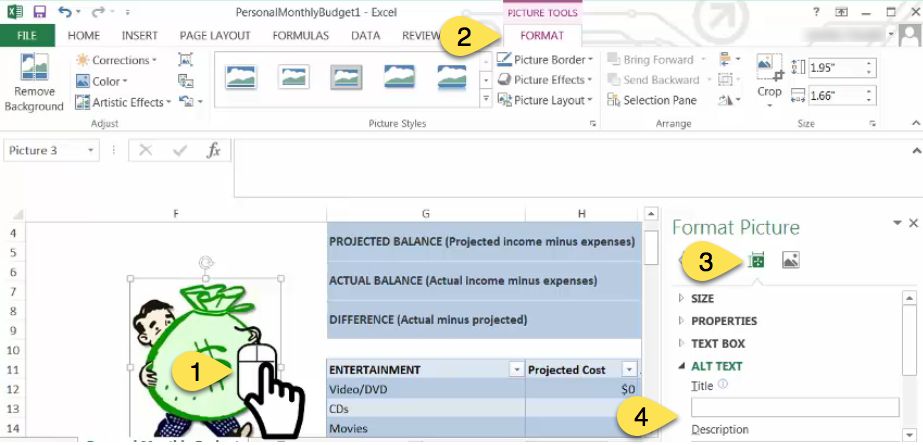
- Right click the image or object.
- In the ribbon menu click Format.
- Under Format Picture, find the size icon that has a cross hair icon and select it. Type a Title for the image or object and a Description in the text box. Use clear and concise descriptions such as “man with a big green bag of money” instead of “man with bag."
Tips for writing Alt text
Try to answer the question "what information is the image conveying?"
- If the image does not convey any useful information, leave the alternative text blank.
- If the image contains meaningful text, ensure all of the text is replicated.
- Alternative text should be fairly short, usually a sentence or less and rarely more than two sentences.
- If more description is required (e.g., for a chart or graph), provide a short description in the alternative text (e.g., a summary of the trend) and more detail in the long description.
- Test by having others review the document with the images replaced by the alternative text.
Tips for writing longer descriptions
- Long descriptions should be used when text alternatives (see above) are insufficient to answer the question "what information is the image conveying?"
- In some situations, the information being conveyed will be how an image looks (e.g., an artwork, architectural detail, etc.). In these cases, try to describe the image without making too many of your own assumptions.
- One approach is to imagine you are describing the image to a person over the phone.
- Ensure that you still provide concise alternative text to help readers decide if they are interested in the longer description.
To learn more, see Add alternative text to a shape, picture, chart, table, SmartArt graphic, or other object.
How to Create a Header Row
In addition to adding alt text that describes the table, having clear headings provide context and assist navigation of the table’s contents.
To specify a header row in a block of cells marked as a table, do the following:
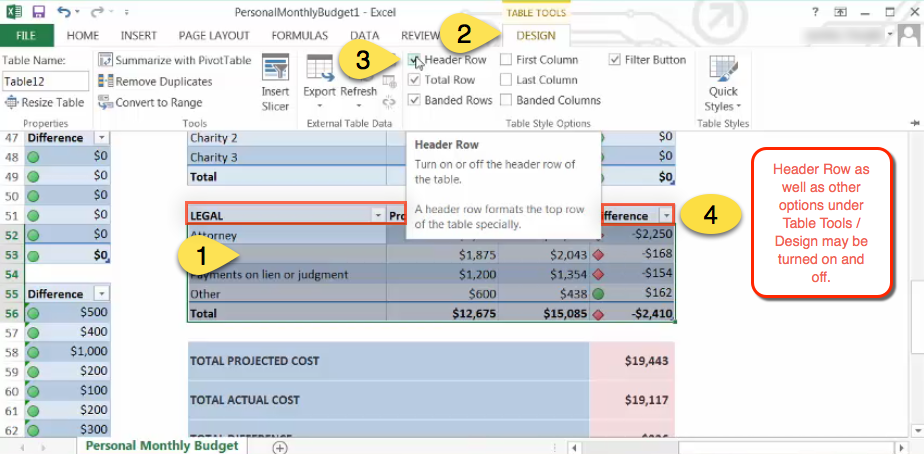
- Click anywhere inside the table.
- In the ribbon menu select Design.
- The menu reveals various options. Check the box Header Row.
- This action will create a new row on top of the table. Add distinctive names for each column; do not duplicate names.
Adding Hyperlinks
Hyperlink text should provide a clear description of the link destination, rather than only providing the URL. For example, " Mike’s Auto Shop" is more meaningful than "http://www.mikefixescarsforyou.com".
To add a hyperlink to your workbook, do the following:
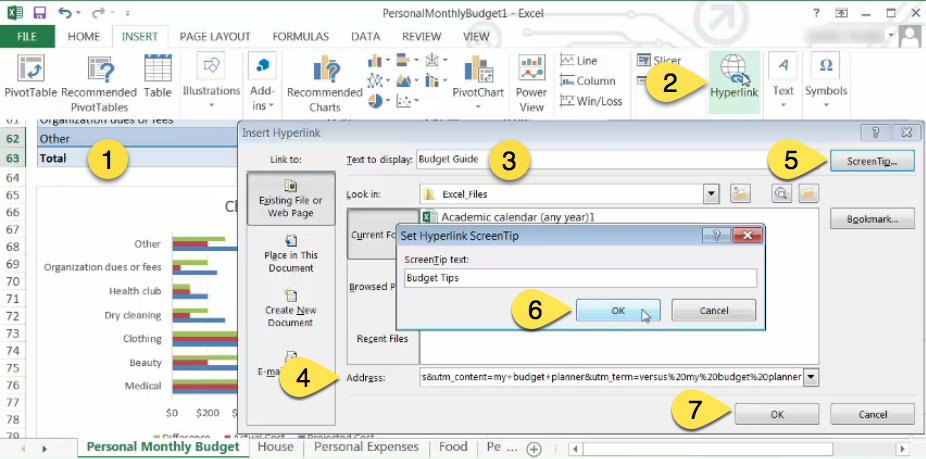
- Place the cursor in the cell where you want to add the hyperlink.
- Select Hyperlink in the ribbon menu under Insert.
- In the Text to display box, type the name or phrase that will briefly describe the destination link, do not use the URL.
- In the Address box, type the link URL.
- You can also add ScreenTip text to add information that appears when the cursor hovers over a hyperlink. ScreenTips may be used in a similar way to Alt text.
- Type in a concise and relevant term –or a brief 3-word description– in the ScreenTip textbox and click OK to close the ScreenTip window.
- Click OK to save the changes.
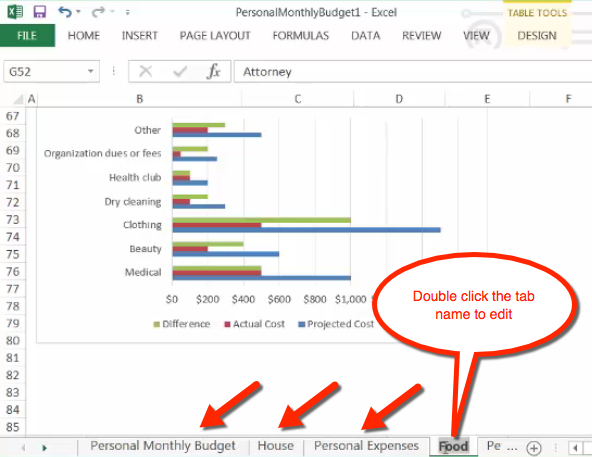
Give Unique Names to All Worksheets
The sheet names make it easier to navigate through a workbook. The names should provide information of the content. Any blank sheets in a workbook should be removed.
To name or rename a sheet double click the tab. Type a brief, unique descriptive name.
To delete a sheet right-click the sheet tab and click Delete .
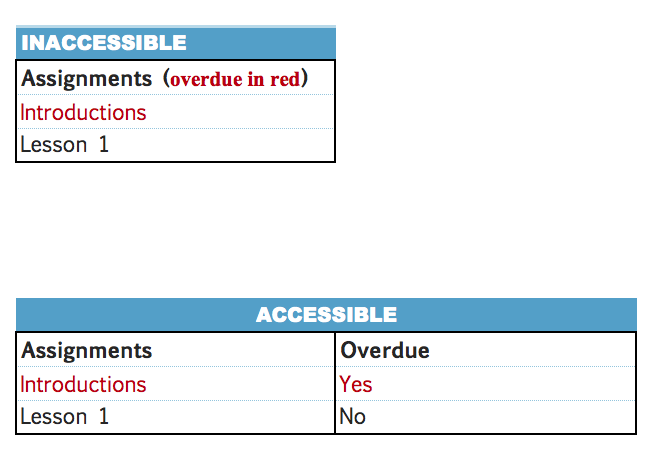
Color
Do not use color alone to label information, instead add a column with details.